STOCKTAKE AIRTABLE
ScanSKU Cloud Stocktaking is a solution for completing your stocktaking by saving records to a AirTable. AirTable is very similar to Microsoft Excel, but is on the cloud, so you can access your data from any device which has internet access.
Perfect for use on the ScanSKU R Series Scanners
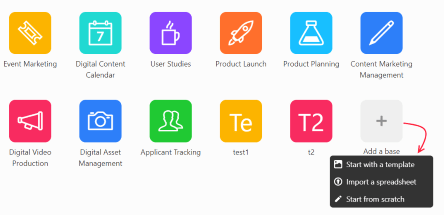
1. Create an account HERE or simply log into Airtable. Next, create a spreadsheet using “Add a base” and then selecting “Start from scratch”
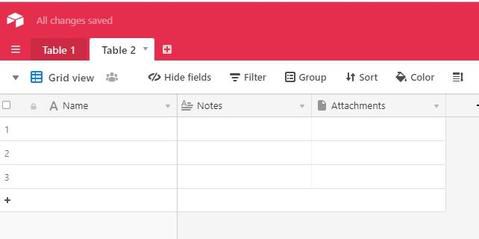
2. After assigning a name, you’ll be brought to a screen like below
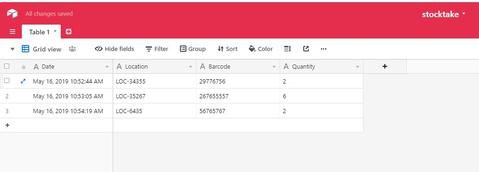
3. Delete the exiting columns and create 4 new ones as per the below Screenshot. The column names are: Date, Location, Barcode and Quantity. All these fields should be ‘single line text ‘ as the field type.
4. On your Device Open the App you downloaded and click Help/Settings. You will need to get 3 settings from your AirTable to make the connection between the app and the table.

API KEY – You can find this in AirTable by clicking on then “Account” button in the top right of the screen then selecting “Account” from the drop down.Then click generate API key and enter this into the API Key field in the App.

Base ID- You’ll need to retrieve an id (BaseId) that is a unique id for the selected table. Goto https://airtable.com/api and then select the spreadsheet that was just created. When the page opens, scroll down to “AUTHENTICATION” and on right hand side select “node.js”. Take note of this BaseID. It begins with “app…“
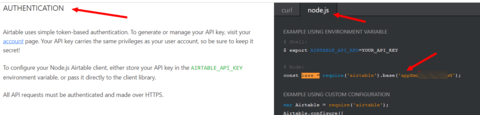
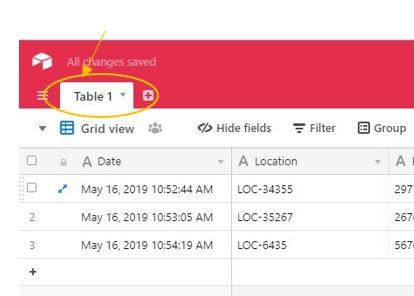
Table Name - This will be Table 1 by default so you don’t need to enter this if you don’t change it in AirTable. It represents the name of the Sheet, so if you change this name, then ensure the new name is in the App settings as well.
Once you have entered all 3 settings, Click Save Settings, and you can now begin scanning and saving records!
TroubleShooting
– I get an error when saving a record
The Majority of the time this will be due to an API code or BaseID. Check for spaces before or after the codes. Also check the column headings in the table itself to ensure they match as per above.
– When scanning, the curser does not move to the next field
You need to enable ‘enter after scan’ Most hardware devices have this as a setting. On the R Series, you can find this in the ‘Scanner’ App, Under Settings-> Additional Content
– I don’t need to record locations, how do I remove this field
Whilst you can’t remove the field you can set ‘lock Location’. Then put the location as something generic such as ‘Warehouse 1’. It will not ask you to input the location again until you untick the box